Setup a continuous integration process to build and test a Java web app with Jenkins
Jenkins is an open-source self-hosted automation server. It is very popular amongst the DevOps engineers for implementing continuous integration and continuous delivery in the software development life cycle. Jenkins is written in Java and provides out of the box support for building Apache Ant, Maven, and sbt projects. It can also execute Linux shell and Windows batch scripts. Multiple version control systems such as Git, Mercurial, Subversion, CVS, etc. are fully supported by Jenkins. At least a thousand plugins are available to increase the functionality of the application.
This series of articles will guide you through the installation of Jenkins, GitLab, Harbor, and use it for continuous integration and deployment. I assume you have some basic knowledge of Linux, Docker, and Shell Script.
Environment setup
| Name | IP | Software |
|---|---|---|
| Jenkins | 192.168.1.19 | Jenkins-2.190.3, SonarQube, Tomcat |
| Repository | 192.168.1.20 | Gitlab-12.4.2 |
| Testing Server | 192.168.1.x | Docker |
| Production Server | 192.168.1.x | Docker, Tomcat |
Before installing Jenkins, we need to get the server environment ready, such as hostname, NTP
Set Hostname
# hostnamectl set-hostname Jenkins
Sync with NTP Time server
Install NTP service
# yum install ntp ntpdate
Once NTP is installed we need to start and enable the ntpd service, which will automatically start on boot.
# systemctl start ntpd
# systemctl enable ntpd
# systemctl status ntpd
It is the best way to choose the NTP server that is closed to you.
edit /etc/ntpd.conf and update server section.
# Use public servers from the pool.ntp.org project.
# Please consider joining the pool (http://www.pool.ntp.org/join.html).
#server 0.centos.pool.ntp.org iburst
#server 1.centos.pool.ntp.org iburst
#server 2.centos.pool.ntp.org iburst
#server 3.centos.pool.ntp.org iburst

#add closed NTP server address
server ntp1.aliyun.com iburst
server ntp2.aliyun.com iburst
server ntp3.aliyun.com iburst
server ntp4.aliyun.com iburst
Check synchronization status.
[root@jenkins ~]# ntpstat
synchronised to NTP server (120.25.115.20) at stratum 3
   time correct to within 92 ms
   polling server every 64 s
Flush iptables rules and disable iptables service
[root@jenkins ~]# iptables -F
[root@jenkins ~]# iptables-save
[root@jenkins ~]# systemctl stop iptables
[root@jenkins ~]# systemctl disable iptables
Install Java and Tomcat
Install Java JDK
[root@jenkins ~]# yum install java-1.8.0-openjdk-devel
Download and Install Apache Tomcat
# wget https://downloads.apache.org/tomcat/tomcat-8/v8.5.54/bin/apache-tomcat-8.5.54.tar.gz
Extract & move the software
# tar zxvf apache-tomcat-8.5.47.tar.gz
# mv apache-tomcat-8.5.47 /opt/tomcat
Start Tomcat
# /opt/tomcat/bin/startup.sh
 Using CATALINA_BASE:   /opt/tomcat
 Using CATALINA_HOME:   /opt/tomcat
 Using CATALINA_TMPDIR: /opt/tomcat/temp
 Using JRE_HOME:        /usr
 Using CLASSPATH:       /opt/tomcat/bin/bootstrap.jar:/opt/tomcat/bin/tomcat-juli.jar
 Tomcat started.
Install Jenkins on CentOS 7
Jenkins can be installed on different platforms, such as Windows, Linux, Docker, Java servlet container etc, in this article we will run it as a servlet in Tomcat servlet container.
Download Jenkins
wget http://mirrors.jenkins.io/war-stable/latest/jenkins.war
Move Jenkins.war to tomcat home directory /opt/tomcat/webapps
mv jenkins.war /opt/tomcat/webapps
Access http://192.168.1.19:8080/jenkins to install Jenkins
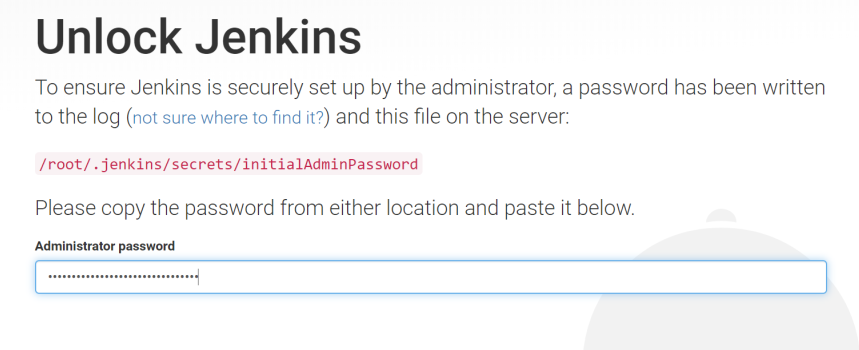
Check the password from the file
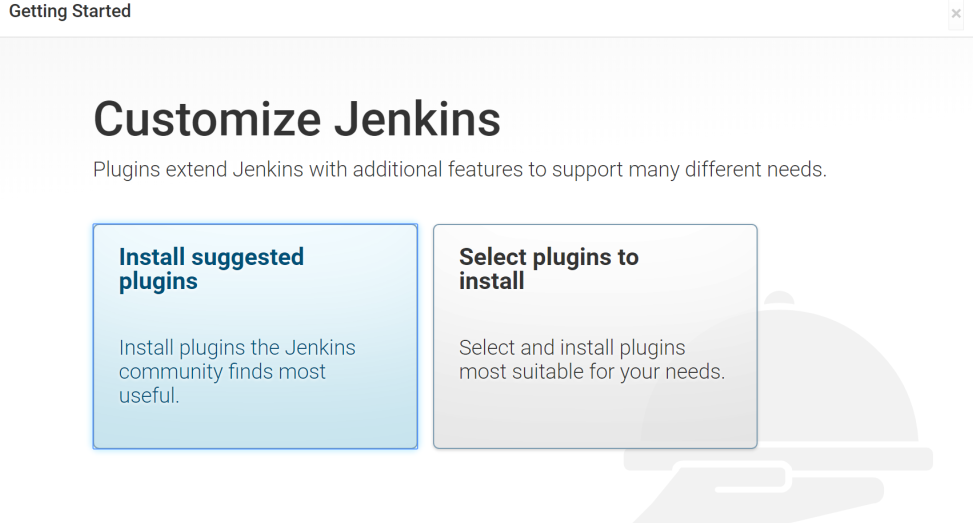
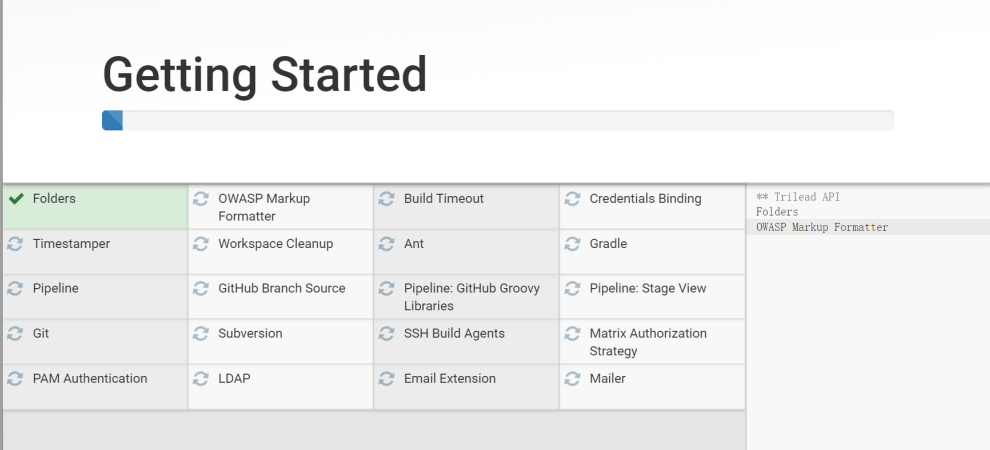
Once enter a password, Jenkins allows you to either choose suggested plugins or choose your own plugins.
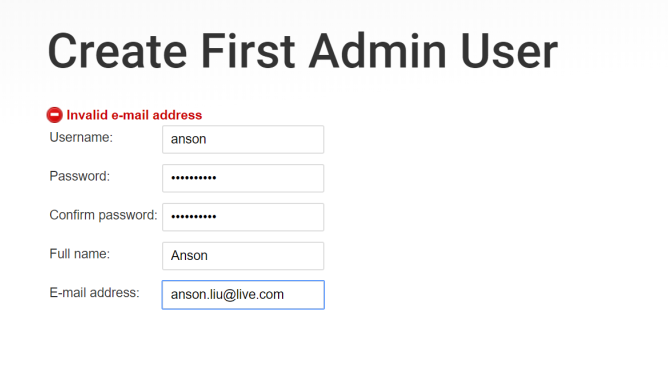
Create the first user
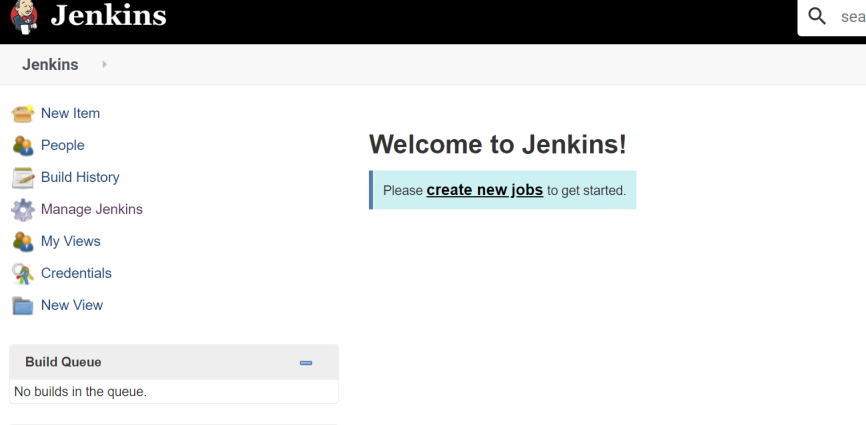
After install finished, you will redirect to Jenkin’s home page.
Configure Jenkins
Install and Configure Maven, download Maven from apache website, extract the package and move to /opt/maven/
[root@jenkins ~]# tar zxvf apache-maven-3.6.2-bin.tar.gz
[root@jenkins ~]# mv apache-maven-3.6.2 /opt/maven
Configure Maven environment, edit /etc/profile, add the following
export JAVA_HOME=/usr/lib/jvm/java-1.8.0-openjdk
export MAVEN_HOME=/opt/maven
export PATH=$PATH:$JAVA_HOME/bin:$MAVEN_HOME/bin
Reload /etc/profile file
[root@jenkins jvm]# source /etc/profile
Check mvn
[root@jenkins jvm]# mvn -v
Apache Maven 3.6.2 (40f52333136460af0dc0d7232c0dc0bcf0d9e117; 2019-08-27T23:06:16+08:00)
Maven home: /opt/maven
Java version: 1.8.0_242, vendor: Oracle Corporation, runtime: /usr/lib/jvm/java-1.8.0-openjdk-1.8.0.242.b08-0.el7_7.x86_64/jre
Default locale: en_US, platform encoding: UTF-8
OS name: "linux", version: "3.10.0-1062.18.1.el7.x86_64", arch: "amd64", family: "unix"
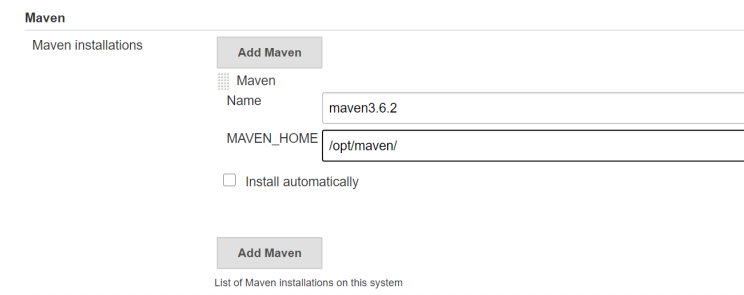
Setting JDK and Maven in Jenkins,
Jenkins->Global Tool Configuration->JDK->Add JDK
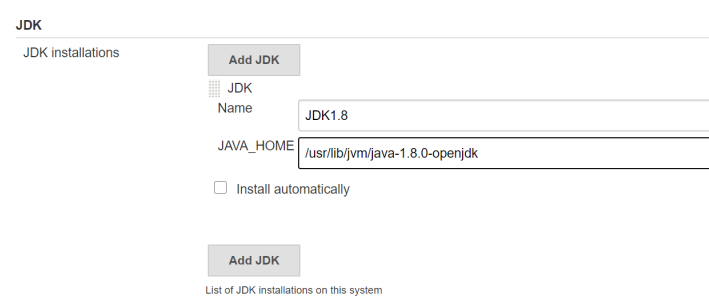
Jenkins->Global Tool Configuration->JDK->Add Maven
Add Global properties in Jenkins
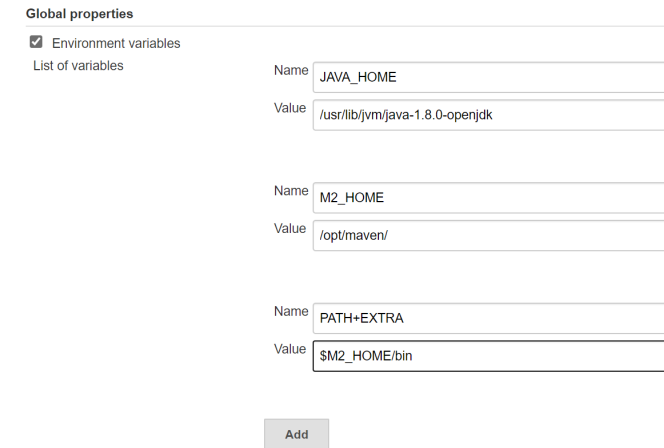
Manage Jenkins->Configure System->Global Properties, add three Environment variables.
