One customer requested us to renew their certificate because they received a pop-up message when opening Outlook client.
Their Certificates Renewal List:
- mail certificate is going to expire in 7 days
- Microsoft Exchange Auth Certificate has expired for a couple of days.
- Root CA certificate is going to expire in 7 days.
It’s a simple task, just navigate to the certificate page, request a new request file, download certificate file and complete renewal. but when I open the certificate page, I got the error message. I tried various ways to fix it but failed. I have no idea how to fix until now.

So I have to renew the certificate with PowerShell commands.
Viewing the All Certificate
Get-ExchangeCertificate | fl friendlyname, certificatedomains, thumbprint, notafter
From the screenshot, “mail2” is going to expire and “Microsoft Exchange Server Auth Certificate” has expired. we need to renew both.
Microsoft Exchange Server Auth Certificate is a self-signed and global certificate. it is generated automaticlly when you first install Exchange 2013 or later version. It is used to intergrate aplications such as SharePoint, Exchange Online. By default, it has 5 years lifetime, it is long enough for everyone to forget it.

Setting up a New Microsoft Exchange Auth Certificate
Generate a self-signed certificate
Open a new Exchange Management Shell and use this command to create a self-signed certificate. Replace mail.yourdomain.com with your environment domain name.
New-ExchangeCertificate -KeySize 2048 -PrivateKeyExportable $true -SubjectName “cn= Microsoft Exchange Server Auth Certificate” -DomainName “mail.yourdomain.com” -FriendlyName “Microsoft Exchange Server Auth Certificate” -Services SMTP

Assign the newly created self-signed certificate as the global Auth certificate
$dt = Get-Date
Set-AuthConfig -NewCertificateThumbprint <paste the thumbprint> –NewCertificateEffectiveDate $dt

Publish the new Auth certificate and clear previous certificates:
Set-AuthConfig –PublishCertificate
Set-AuthConfig –ClearPreviousCertficate
Get certification and check again

Renew CA root certificate
CA certificate must be renewed first because another certificate like mail2 is issued by CA. if you renew mail2 certificate first, the lifetime of mail2 will be the same with the lifetime of CA. For example, in this case, the CA certificate and mail2 will expire on the same day – 12/09/2019, when mail2 was renewed and imported, the valid date was still the same. that’s what I made the mistake.
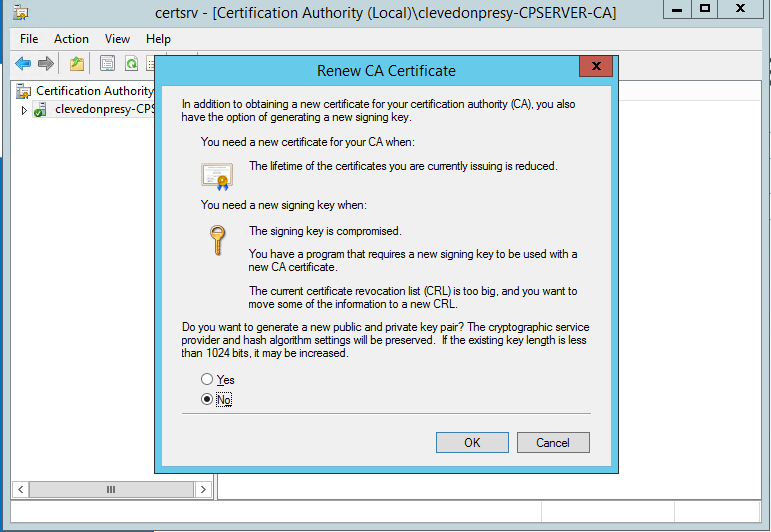
Open Certification Authority, Server->All Tasks->Renew CA certificate

because we just need to renew the lifetime of the certificate, I choose “No”.

After CA certificate renewal, you can find all CA renewal history.


Renew mail2 Certificate
The certificate request data will be returned both in PowerShell and saved to the file at the shared folder or UNC path.
Get-ExchangeCertificate -Thumbprint 559642FCD3DD4769D79A457D11875AF9E6E49F3C | New-ExchangeCertificate -GenerateRequest -RequestFile "\\cqserver\Renewcertificate2016\certreq.txt" -PrivateKeyExportable:$true

In some case, your third certificate provider will ask you to paste the request to their system for processing. In our case, we do not use third certificate, so we request from our CA server. you can find how to request certificate from here.
Import Certificate
Import-ExchangeCertificate -FileName "\\cqserver\Renewcertificate2016\.cer" -PrivateKeyExportable:$true

Enable services for new certificate
Enable-ExchangeCertificate -Thumbprint 5B3E95B2380F764F3C4CAC0B67D2C5DB30C1954F -Services "iis,
 smtp, pop, imap"
Restart IIS and verification

